 An essential part of the built-in memory management system is virtual memory, which allows the system to outgrow the limitations of physical RAM. Since physical memory (alongside the CPU) is in high demand and short supply, the applications you install on a Mac will fight for every single bit available.
While it comes at a certain cost, virtual memory helps the system to escape from the limitations imposed at the moment of purchase – specifically how much RAM your budget allows – and plays a key role in providing a good user experience regardless of memory restrictions.
How Virtual Memory Works
When an application asks for memory space for its processes and data, and there is no free space available, the system checks if there is any occupied but without recent activity. If there is, the system creates a ‘backing store’ on the startup drive, a file that it writes these processes and data to. This process is called page-out or swap-out and the backing store is called the swap file.
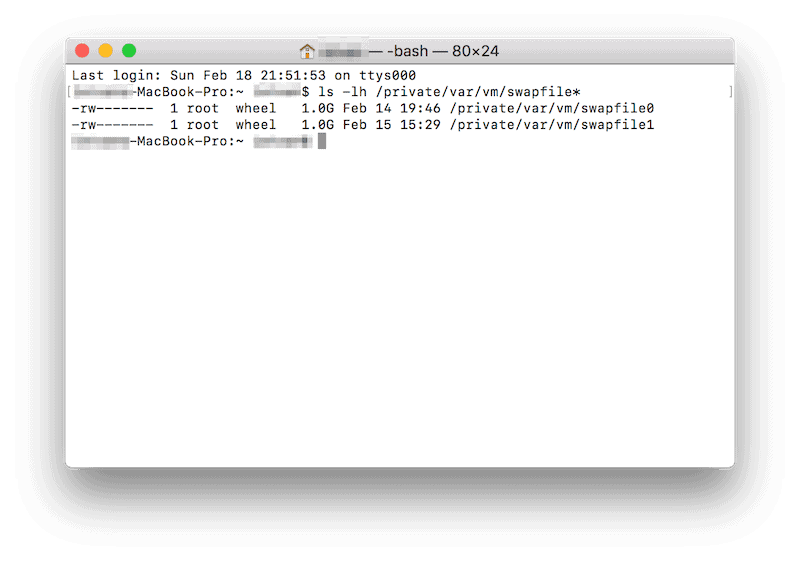
Since the swap file (or files, depending on the amount of memory used) is a component of the virtual memory, it contains the virtual address of the processes paged out from the RAM. This file is saved to the startup disk in the dedicated virtual memory directory.
Depending how many apps are running and the pressure they are putting on the memory, you'll see at least two equally sized chunks of file. In macOS High Sierra, swap files are 1GB in size, but that can vary on older macOS or OS X versions.
Along with the swap files (numbered from 0) in the virtual memory directory, there is also another file called ‘sleepimage’. As the name suggests, this file contains the data located in the Mac's RAM when it is written to disk just before the computer enters into hibernation mode. Sleepimage relates to memory management since it is preserving existing data in the physical memory, hence its place in the virtual memory directory. When the computer wakes from hibernation mode, the data paged out to the sleepimage file is then paged back into the RAM, so users can continue their work from where they left off.
Pros and Cons of Virtual Memory
Virtual memory is useful for the following reasons:
- It lets the system escape from the limitations of physical memory.
- It only exists when it is needed: the system will request virtual memory only when an application demands memory space that is not available. Still, if you have virtual memory enabled, you'll likely see some activity there even if your system has free memory.
- The system creates a backing store on the startup drive to give space to other apps in need of memory space.
Enabling virtual memory, however, brings disadvantages as well:
- Since the swap files are located on the Mac's startup disk, app responsiveness will depend on the speed of the hard drive (ultra-slow) or SSD (slow).
- As memory pressure grows, virtual memory will automatically increase its space demand on the startup disk. If one or multiple apps generate memory leaks, you might end up with a “startup disk full” error message.
How to Check Virtual Memory Usage
Disabling virtual memory is not recommended for systems with low amounts of RAM (4GB and lower), because it will heavily impact overall system stability and the user experience. On Macs with 8GB of RAM or more, virtual memory can be disabled, but we recommend checking its status before doing so. Proceed with disabling virtual memory only if you notice an unusually high amount of swapping.
Fortunately, there is a great command that will show you exactly how the system is handling virtual memory.
To check how macOS uses virtual memory, open Terminal and type in this command, followed by enter:
vm_stat
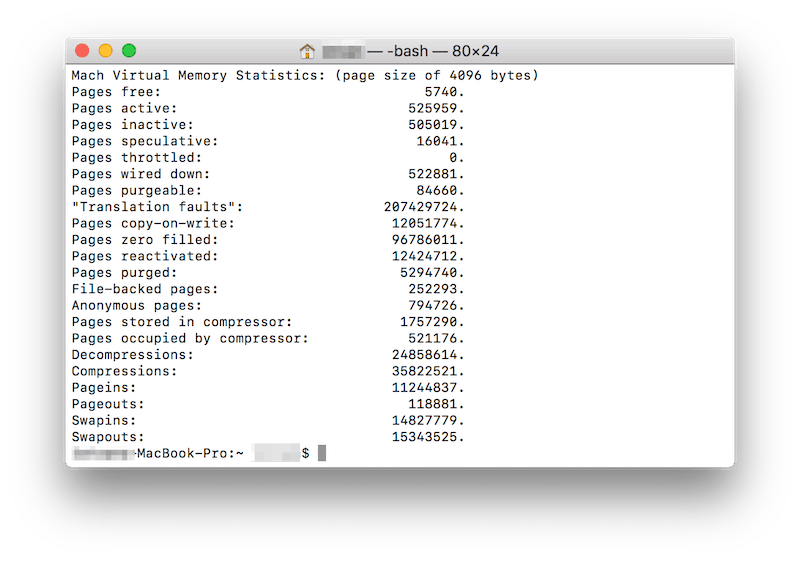
Terminal then will display the current status of memory usage. If an interval is specified, vm_stat will update the statistics each time this interval is met. As you can see from the example below, vm_stat will display the total number of free, active, inactive, and wired pages, along with the total number of swap-ins and swap-outs.
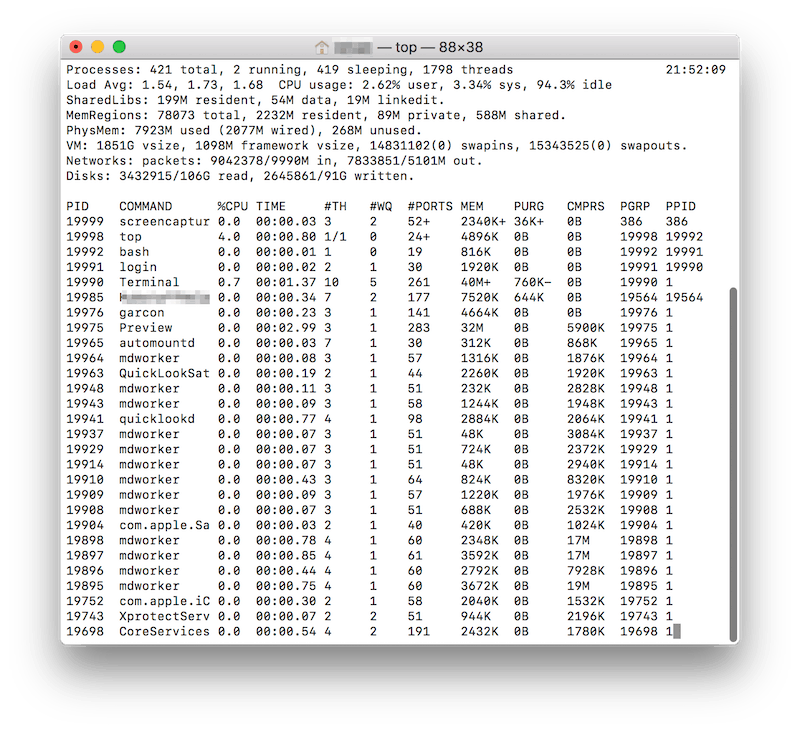
You can also get some virtual memory usage statistics using the ‘top’ command. To get that data, simply open Terminal and type “top” followed by enter, and you'll see an updated live list of memory usage alongside other relevant information.
Best Mac Optimization Software of 2024
| Rank | Company | Info | Visit |
|
1
|
|
||
|
2
|
|
||
|
3
|
|
Get the Best Deals on Mac Optimization Software
Stay up to date on the latest tech news and discounts on Mac optimization software with our monthly newsletter.
Share Your Comment